 Lynden Siding
 Building New in Birch Bay Means Getting the Windows Right the First Time
New construction gives you one real advantage over a remodel: you get to do the window installation correctly from the studs out, before drywall, siding, or paint cover up the work. That's also the risk. On a new build in Birch Bay, the window opening, the flashing, and the water management plan behind the trim only get built once. If they're done wrong, you don't find out until a wall is wet years later, and by then the fix means tearing into finished siding and interior walls instead of a five-minute flashing correction during framing.
We're a Lynden-based crew that works new-construction windows in Birch Bay regularly, alongside jobs throughout Whatcom County. This page is about that one job, in that one place: what the local climate asks of a new-construction window install, what correct work actually looks like, and why it matters who's holding the caulk gun.
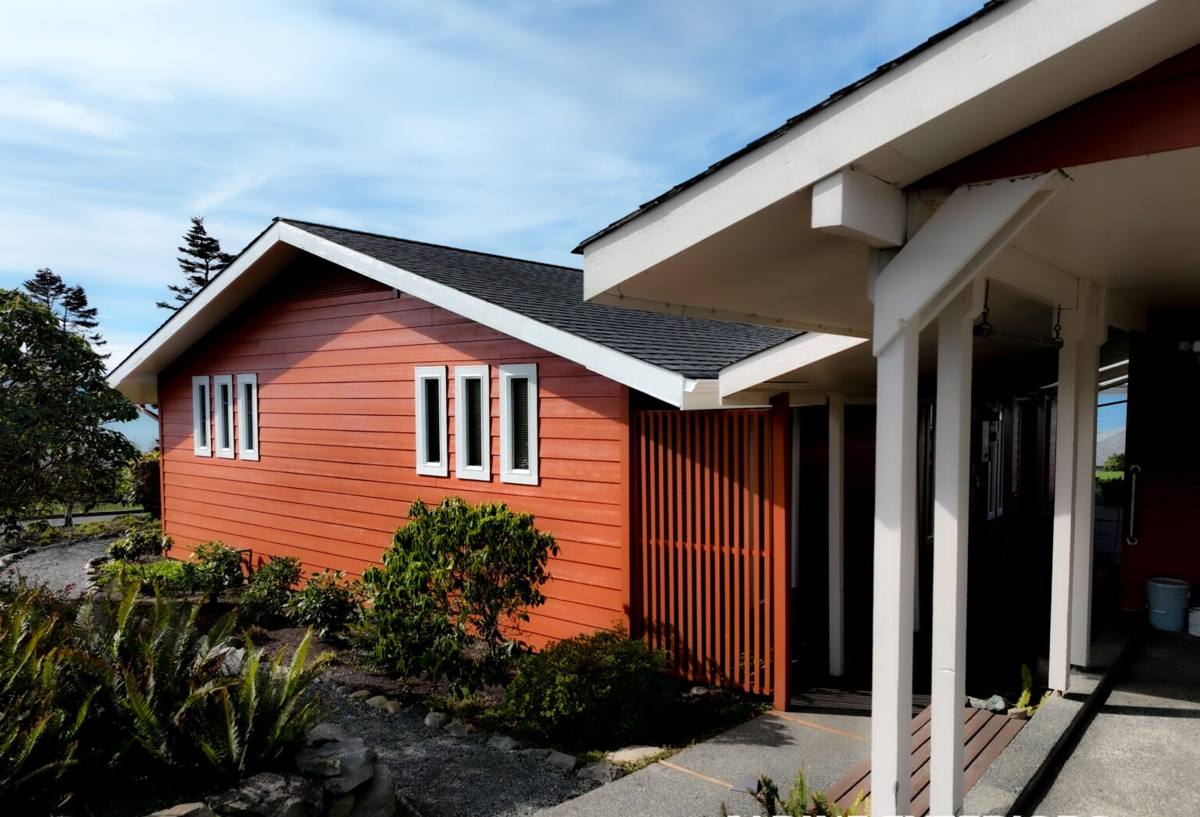
What Birch Bay's Climate Actually Does to a New Window Opening
Salt Air and Marine Exposure
Birch Bay sits directly on saltwater, and homes close to the shoreline take on airborne salt that regular Whatcom County inland construction doesn't deal with. Salt-laden moisture accelerates corrosion on exposed metal fasteners, hardware, and some window frame components over time. It's not usually dramatic — it's slow, cumulative wear that shows up as pitting, discoloration, or hardware that starts sticking years earlier than it should. This is a materials and detailing question more than a marketing one: it affects what fastener types and frame finishes make sense for a home in that exposure band, not just what looks good on day one.
Driving Rain and Wind-Driven Water
Open water frontage means wind-driven rain hits Birch Bay homes at angles that inland Lynden properties rarely see. A window opening that would shed water fine on a sheltered lot can take rain sideways here, which pushes water up under sills and behind trim if the flashing sequence isn't built to handle it. New-construction windows have an advantage here because the flashing can be integrated properly with the weather-resistive barrier before siding goes on — but only if that step is actually done with care, not rushed to keep the framing schedule moving.
Moss, Shade, and Long Wet Seasons
Whatcom County's long, mild wet season keeps exterior surfaces damp for extended stretches, and shaded or north-facing walls in Birch Bay can stay green with moss and algae growth for much of the year. That constant moisture cycling is hard on caulk joints, exposed wood trim, and any gap in the water management plan around a window. A window opening built with a proper sloped sill pan and correctly lapped flashing sheds that moisture instead of holding it against the frame.
New-Construction Windows vs. Replacement Windows: Why the Method Matters
"New-construction" isn't just a window style — it describes an installation method built around a nailing flange that gets integrated directly into the wall's water management system during framing, before siding goes on. Replacement windows are built to slide into an existing opening without disturbing finished siding. Using the wrong approach, or applying replacement-style shortcuts to a new build, is one of the more common ways a new home ends up with an avoidable moisture problem.
| Factor | New-Construction Method | Replacement Method |
|---|---|---|
| When it's used | New builds, additions, or full wall reframes | Existing openings with intact exterior siding |
| How it attaches | Nailing flange fastened to sheathing, flashed into the WRB | Frame fits inside the existing opening, sealed at the perimeter |
| Water management | Built into the wall assembly during framing | Relies on the existing opening's condition and sealant |
| Best fit for Birch Bay new builds | Correct approach — full flashing integration possible | Not applicable until the home is finished and aging |
On a new build, there's no reason to use anything other than the new-construction method — the opening is open, the WRB is exposed, and there's a real chance to get the flashing sequence right the first time.
What a Correct New-Construction Window Install Actually Involves
The window unit itself is only part of the job. The parts that determine whether a Birch Bay home stays dry for the next thirty years are mostly hidden once the trim goes on:
- A sloped or pre-formed sill pan at the bottom of the rough opening, so any water that gets past the window drains back out instead of pooling
- Weather-resistive barrier cut and lapped correctly at the jambs and head, so water sheds down and over each layer like shingles
- Flashing tape or flexible flashing integrated with the WRB in the correct shingle-lap order — head flashing last, over the top of the side flashing
- The window set level, plumb, and square in the opening, shimmed correctly so the frame isn't under stress that can cause the sash to bind or seal poorly
- Fasteners appropriate to the exposure — a real consideration in a salt-air location like Birch Bay
- Continuous, backed sealant at the exterior perimeter, plus interior air sealing so the assembly manages both bulk water and air movement
- Head flashing or a drip cap detail sized to actually kick water clear of the sill below, especially on walls that take direct wind-driven rain
Skip or rush any one of those steps and the window can look fine — and even pass a casual walk-through — while still being set up to leak in three, five, or ten years. That's the uncomfortable part of new construction: the mistakes are invisible until they aren't.
Choosing Frame Materials for a Birch Bay New Build
Frame material is a real decision here, not just an aesthetic one, because of the salt air and sustained moisture exposure. There's no single right answer for every home — it depends on budget, sun exposure, and how close the lot sits to the water — but it's worth understanding the trade-offs before you commit for a build that's supposed to last decades.
| Frame Type | How It Handles This Climate | Maintenance Consideration |
|---|---|---|
| Vinyl | Won't corrode in salt air; performs consistently in wet climates | Low maintenance; limited color and repaint options |
| Fiberglass | Very stable in temperature and moisture swings; strong long-term performer near water | Low maintenance; higher upfront cost |
| Aluminum-clad wood | Good exterior protection from clad layer, but exposed fasteners and cladding seams need attention in salt air | Moderate; watch cladding seams and hardware over time |
| Bare wood | Requires the most protection from driving rain and moss-season moisture | Highest maintenance; regular repainting and sealing needed |
For homes closer to the water in Birch Bay, we lean toward materials that don't rely on painted finishes or exposed metal to stay weathertight, simply because that's less upkeep for the homeowner over time. We'll walk through the honest trade-offs for your specific lot and budget rather than pushing one option.
Our Process for a Birch Bay New-Construction Window Install
We coordinate directly with your builder or general contractor so the window install lines up with the framing and siding schedule instead of fighting it.
- Plan review: We review window schedules and rough opening sizes against the actual framing before anything is ordered, catching sizing or spec mismatches early.
- Rough opening check: Before install, we confirm openings are square, correctly sized, and that the WRB is in place and ready for flashing integration.
- Sill pan and flashing: We build the sill pan and flash each opening in the correct shingle-lap sequence, matched to the wall's water management plan.
- Set and secure: Windows are set level, plumb, and square, shimmed properly, and fastened with hardware suited to the site's exposure.
- Seal and verify: Exterior sealant and interior air sealing are completed, and we walk the openings before siding closes them in, since that's the last point where a flashing issue is easy to fix.
That last step matters more in Birch Bay than in a sheltered inland lot. Once siding goes on over a bad flashing detail, correcting it later is a much bigger job than catching it now.
Why a Crew That Already Works Birch Bay Matters
Window installation fundamentals don't change from neighborhood to neighborhood, but judgment calls do — how much overhang a given wall has, whether a wall faces the open water or sits behind a windbreak, how much shade keeps a north wall damp longer into the season. A crew that's worked new construction in Birch Bay before has already made those calls on other homes nearby and knows which walls need extra attention before the first storm season tests them. That's a different starting point than a crew learning the site's exposure for the first time on your build.
We're based in Lynden and work new-construction windows throughout Whatcom County, including Birch Bay's shoreline and near-shoreline lots. We show up knowing what this stretch of coastline does to an exterior wall assembly, and we build the window openings accordingly.
Common Mistakes We See on New-Construction Window Jobs
Most window problems on new builds trace back to a handful of avoidable shortcuts:
- Flashing installed out of sequence, so water gets trapped behind a layer instead of shed down and out
- Sealant used as the primary water barrier instead of a backup to proper flashing
- No sill pan, or a flat sill pan with no slope to drain water back out
- Windows shimmed and fastened under stress, which can affect long-term seal performance and operation
- Fastener choices that don't account for salt-air exposure on shoreline lots
- Head flashing skipped or undersized on walls that take direct wind-driven rain
None of these show up on a walk-through the week the windows go in. They show up years later, which is exactly why getting them right during framing — while the wall is still open — is worth the extra care.
Getting an Estimate for Your Birch Bay Build
If you're framing a new home or addition in Birch Bay, or coordinating windows for a build already underway, we're glad to take a look at your plans and walk the site. There's no pressure and no cost to get our take on window selection, flashing details, and how the schedule should line up with your framing and siding work — use the form below to request a free estimate.